How to Update Your WordPress Website Safely
Keeping your WordPress website up to date is one of the most important responsibilities of website ownership. WordPress updates help improve security, fix bugs, add new features, and maintain compatibility with modern browsers and devices. When updates are ignored, websites become more vulnerable to hacks, errors, and performance issues. Over time, outdated software can cause your site to break entirely.
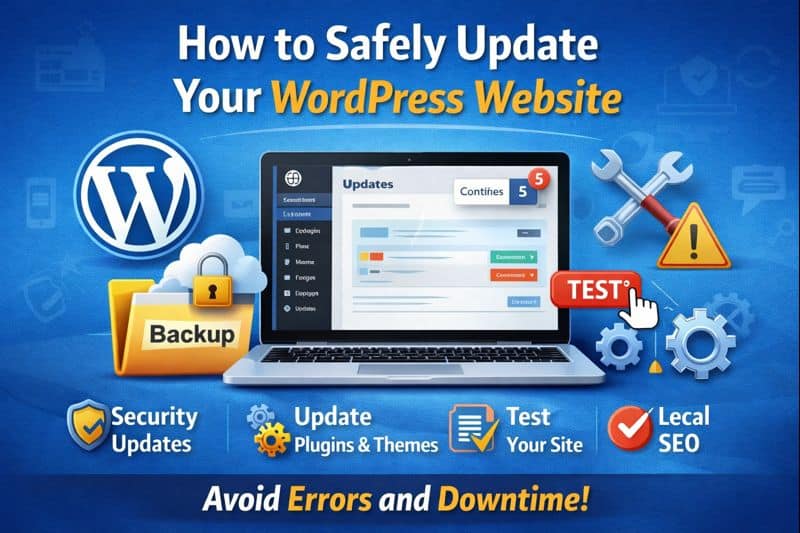
While updating WordPress is essential, it must be done carefully. Updating without proper preparation can result in plugin conflicts, layout issues, or downtime that affects your visitors and customers. That is why following a structured update process is critical. This guide explains how to update your WordPress website safely, step by step, so you can protect your site while keeping it running smoothly.
Whether you manage a small business website, a blog, or a lead generation site, understanding how updates work will help you make better decisions. If updates ever feel overwhelming or risky, professional website design and optimization support can help keep everything running smoothly.
Why WordPress Updates Are Important
WordPress updates play a major role in website security. Many updates include patches that fix vulnerabilities discovered by developers and security researchers. Hackers actively look for outdated WordPress sites because known vulnerabilities are easier to exploit. Keeping WordPress core, plugins, and themes updated significantly reduces your risk of being compromised.
Updates also improve performance and stability. As WordPress evolves, new versions are optimized for speed, efficiency, and compatibility with modern hosting environments. Plugins and themes are also updated to work properly with the latest WordPress releases. When updates are skipped, websites may load slowly, display incorrectly, or fail to function as intended.
Search engines also favor well maintained websites. Outdated software can negatively impact user experience, mobile compatibility, and site speed. These factors influence SEO performance over time, which is why updates play a supporting role in effective SEO strategies.
Step 1: Always Back Up Your Website Before Updating
Before making any changes to your WordPress website, you should always create a complete backup. A full backup includes your website files, database, plugins, themes, and uploaded media. This backup allows you to restore your site quickly if an update causes problems.
There are several ways to back up a WordPress website. Many hosting providers offer built in backup tools that allow you to restore your site with a single click. Backup plugins can also automate backups and store them securely off site. Manual backups are another option but require technical knowledge.
Never assume an update will go smoothly. Even well coded plugins can conflict with other software. A backup ensures you have a safety net in place. Skipping this step is one of the most common and costly mistakes WordPress users make.
Step 2: Log In to Your WordPress Dashboard
Once your backup is complete, log in to your WordPress admin dashboard. By default, WordPress login pages are located at http://your-domain-name.com/wp-admin, though many sites use custom login URLs for security purposes. Enter your username and password to access the dashboard.
The WordPress dashboard is where all site management tasks take place. From here, you can manage content, users, plugins, themes, and settings. Updates are handled directly within the dashboard, so understanding where to find update notifications is important.
If you are unable to log in due to errors or forgotten credentials, resolve those issues before proceeding with updates. Updating without proper access or visibility can lead to additional problems.
Step 3: Locate Available Updates
WordPress makes it easy to identify when updates are available. When updates are pending, you will see a red notification badge with a number indicating how many updates need attention. These notifications appear in several places within the dashboard.
You may see update alerts in the Updates menu under the Dashboard section, next to the Plugins menu, or in the admin toolbar at the top of the screen. Clicking any of these notifications will take you to the WordPress updates page.
The updates page provides a clear overview of available updates for WordPress core, plugins, and themes. Reviewing this page before updating helps you understand what changes are being applied and how many components are affected.
Step 4: Update WordPress, Plugins, and Themes in the Correct Order
Updating in the correct order reduces the risk of conflicts and errors. The recommended approach is to update plugins and themes before updating WordPress core. This ensures that third party software is compatible with the latest WordPress version.
Updating Plugins: Plugins extend the functionality of your WordPress site, but they are also a common source of conflicts. Select the plugins you want to update or choose the option to update all plugins. Updating plugins first helps prevent compatibility issues when WordPress core is updated.
Updating Themes: Themes control the design and layout of your website. Even inactive themes should be updated, as outdated themes can pose security risks. If you use a custom theme, consider testing updates in a staging environment first.
Updating WordPress Core: After plugins and themes are updated, return to the updates page and update WordPress core. Core updates often include major security fixes and improvements. Follow on screen instructions carefully and allow the update process to complete without interruption.
After each update group, return to the updates page to confirm that no additional updates remain.
Step 5: Test Your Website After Updates
Testing your website after updates is just as important as the update process itself. Visit your homepage, inner pages, blog posts, and contact pages to ensure everything displays correctly. Test your navigation menus, forms, and buttons.
If your website includes eCommerce functionality, test product pages, carts, and checkout processes. For lead generation sites, submit test forms and verify email notifications. These areas are often affected by plugin conflicts.
If you notice errors, missing content, or layout issues, identify the cause immediately. Plugin conflicts are the most common source of problems. Disable plugins one at a time to isolate the issue, or restore your site from the backup you created earlier.
Common WordPress Update Problems and How to Avoid Them
One common issue after updates is the white screen of death, where your site displays a blank page. This is usually caused by plugin or theme conflicts. Enabling WordPress debug mode or restoring from a backup can resolve this issue.
Another issue is broken layouts or missing features. This can occur when themes or page builders are not fully compatible with updated plugins or WordPress core. Keeping all components updated consistently helps reduce these risks.
Skipping updates for long periods increases the likelihood of problems. Large version jumps introduce more changes at once, making conflicts more likely. Regular updates create a smoother, safer update process.
Should You Use Automatic Updates?
WordPress allows users to enable automatic updates for plugins, themes, and even core software. Automatic updates can be helpful for security patches and minor updates. However, they also carry risks if updates occur without testing.
For simple blogs or low traffic sites, automatic updates may be acceptable. For business websites, automatic updates can cause issues without warning. Many site owners prefer manual updates so they can create backups and test changes immediately.
A balanced approach is to allow automatic updates for minor security releases while manually handling major updates. This provides security benefits without sacrificing control.
Staging Sites and Safe Update Testing
A staging site is a copy of your live website used for testing updates safely. Many hosting providers offer staging environments that allow you to test updates without affecting your live site.
Using a staging site is highly recommended for business websites, custom themes, and complex plugin setups. Updates can be tested, conflicts resolved, and changes verified before being applied to the live site.
This approach minimizes downtime and reduces risk, especially for revenue generating websites.
Should You Update WordPress Yourself or Hire a Professional?
Many website owners are capable of updating WordPress themselves, especially for small or simple sites. However, not everyone has the time or technical knowledge to troubleshoot issues when they arise.
For business websites, downtime can result in lost leads and revenue. Professional WordPress support and maintenance services handle backups, updates, testing, and issue resolution. This provides peace of mind and frees up your time.
If your website plays a key role in lead generation, visibility, or sales, outsourcing updates may be a smart investment.
Keep Your WordPress Website Secure and Up to Date
Updating your WordPress website is essential for security, performance, and long term success. By following a structured update process, creating backups, and testing changes, you can keep your site running smoothly.
Consistent updates help protect your site from security threats, improve user experience, and support SEO performance. Regular maintenance is a foundational part of successful local SEO and website management.
Contact us today for reliable WordPress updates, maintenance, and ongoing website support.